 The Valentine’s Day that my son was two years old, I decided I’d attempt to bake and frost heart-shaped sugar cookies to send with him to Mom’s Day Out. I wanted to be one of “those moms”—moms who sort of breeze into the room airily with a plate of fresh-baked goods and wave off compliments with, “Oh, it was nothing, really. Just whipped these up in a flash.” And mean it.
However, I am not one of those moms. Baking is a chore for me, and most often times, a near disaster. But really, how hard could sugar cookies be?
Apparently, much harder than I anticipated.
Oh, the cookies tasted fine. They were totally edible, as long as you looked past the appearance of a shapeless blob that was supposed to be a scalloped heart. And the powdered sugar icing that I made so often as a child (okay, my mom made it, maybe that was the difference) ran off the cookies in a dripping, messy ooze that caused me to throw the entire batch into the trash and declare myself a complete failure. It was an embarrassment, truly. I’d show you pictures, but fortunately I had enough self-preservation to know better than to take any.
By fall, I decided to give it another whirl. And while I am not nearly as talented as Bridget at Bake at 350, my technique has definitely improved. I’ve since taken cake and cookie decorating classes…and while all the instructors advised using royal icing that for the prettiest cookie, I’m here to tell you – don’t. Well, unless you actually like royal icing, that is. Then go for it. Personally, I like my cookies to look pretty and taste yummy, and not have to worry about cracking a tooth on the cement-like hardness you’ll find with royal icing.
This icing is probably very similar to the powdered sugar icing we made as kids, with a bit of corn syrup added in to give them a slight sheen.
Here’s the skinny (well, it’s not actually skinny, since eating these are likely to cause weight gain upwards of five pounds, but you know what I mean):
Grab your ingredients:
- 4 cups powdered sugar
- 6 tablespoons whole milk
- 6 tablespoons light corn syrup
- 1 ½ teaspoon almond extract
In a large mixing bowl, whisk together powdered sugar and milk until smooth.
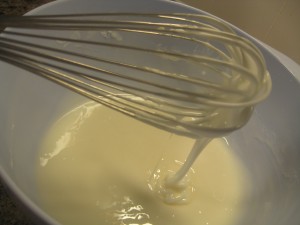
Add in corn syrup, and 1 ½ teaspoons almond extract. You can use vanilla extract if you wish; but almond really tastes the best here. With a strong arm, whisk together until the icing is shiny and smooth and drizzles off your whisk easily.
The consistency you have at this point is what you’ll use to fill your cookies. But unless you thicken some up first to use as a dam, you’re going to be left with a runny mess everywhere. Trust me on this; I have plenty of experience.
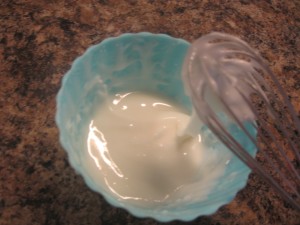
Using a small bowl, pour in a bit of your thin consistency icing. Sprinkle in some additional powdered sugar and whisk again, until smooth and difficult to mix by hand. It’s going to look thick—this is a good thing!
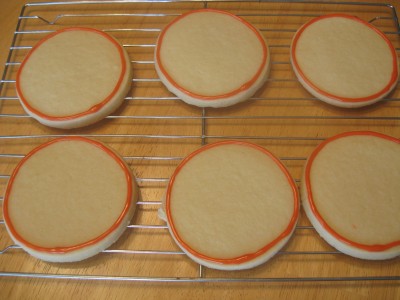
Fill a piping bag (or a Ziploc with the corner snipped) with your thick icing. Using a #3 or #4 decorator tip, outline your cookie:
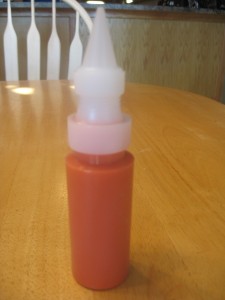
I’ve tried many different methods to fill my cookies, but I’ve found these decorator bottles work the best and cause me the least amount of stress. You can find them at Michael’s, Hobby Lobby, or anywhere cake decorating supplies are sold:

Carefully squeeze your thin consistency icing onto your cookie. Do not be tempted to immediately fill in every gap and cranny. This icing is runny and will spread—if you squeeze too much on, there is no dam in the world that can save you from overflow. Again, just trust me.


It’s really best to let these dry for a few hours before decorating, but I usually don’t have that much patience. I pop them in the refrigerator for a about 30 minutes and then get started. If they are dry to the touch, you should be good to go.
Again, using your thick icing and a #3 or #4 tip, add your decoration or embellishments. I’m making a fairly simple design here, but you get the idea.
Let your cookies dry overnight before stacking. They will eventually harden, but not quite as hard or as quickly as royal icing will. If you really want to look professional, package these in clear cellophane bags and tie with coordinating ribbon. Since I made these for party favors, I added goody-bag tags to mine, designed by
Chickabug.
Read Full Post »
 The Valentine’s Day that my son was two years old, I decided I’d attempt to bake and frost heart-shaped sugar cookies to send with him to Mom’s Day Out. I wanted to be one of “those moms”—moms who sort of breeze into the room airily with a plate of fresh-baked goods and wave off compliments with, “Oh, it was nothing, really. Just whipped these up in a flash.” And mean it.


